
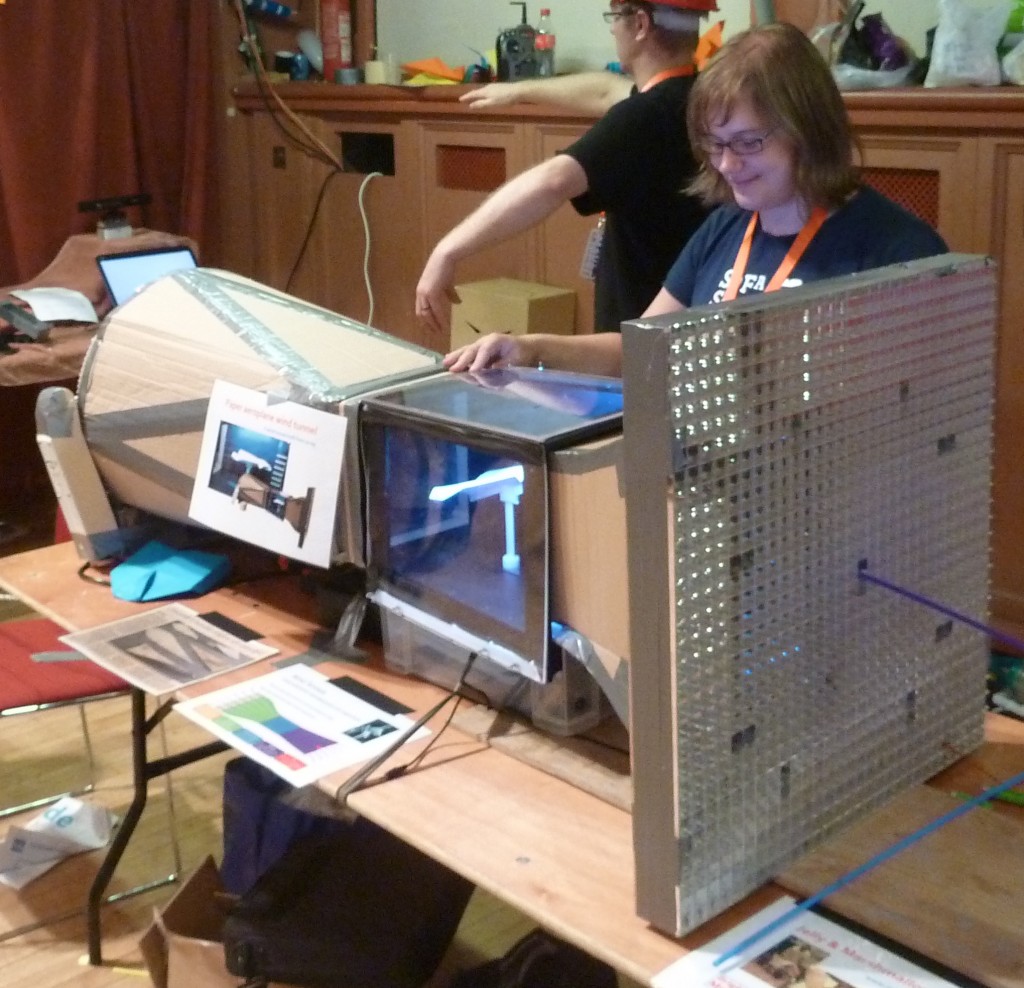
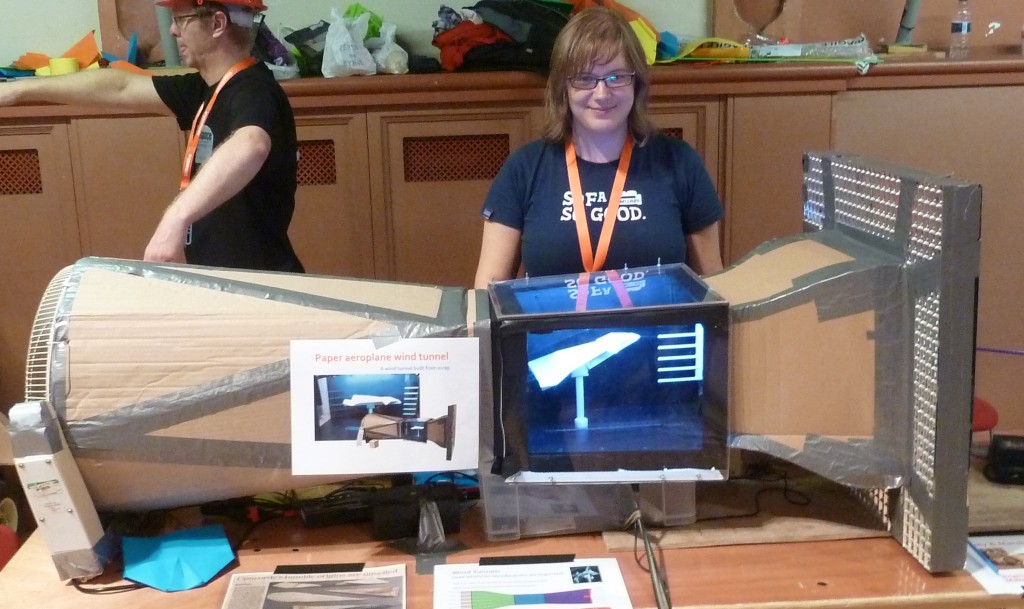
For a while now Mark and I have been wanting to do something with paper aeroplanes, so when looking for a more interactive Maker Faire project we decided to go big and make a wind tunnel with a working section fit for A4 aerodynamics.
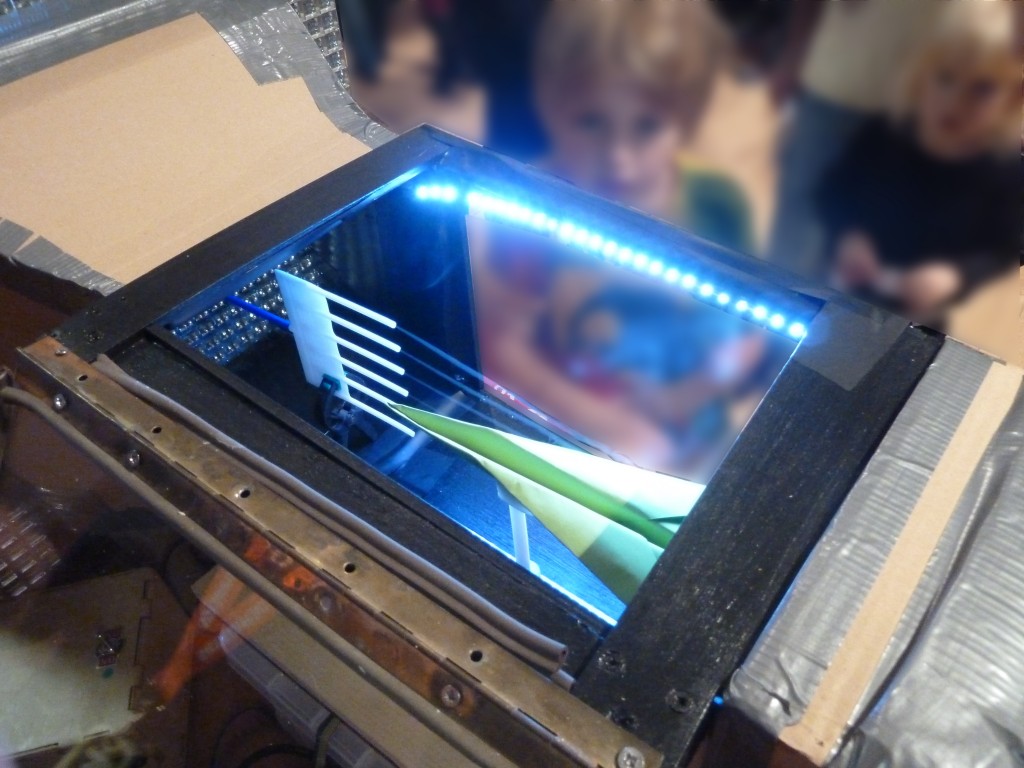
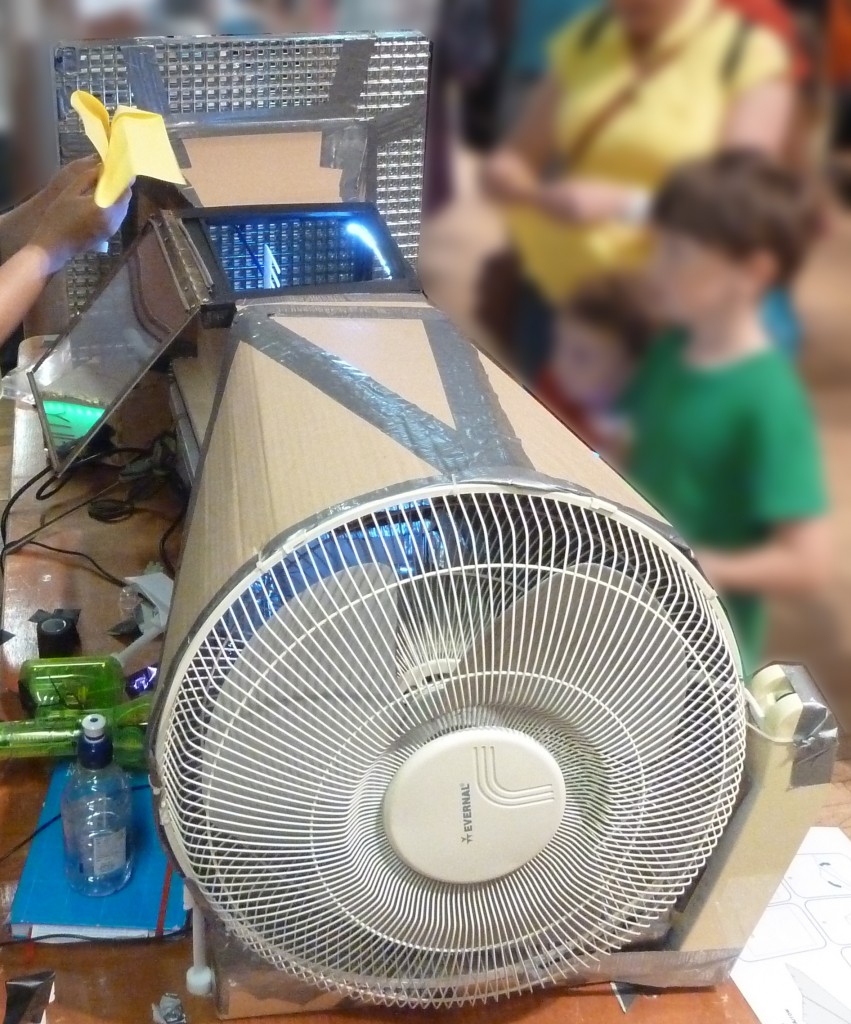
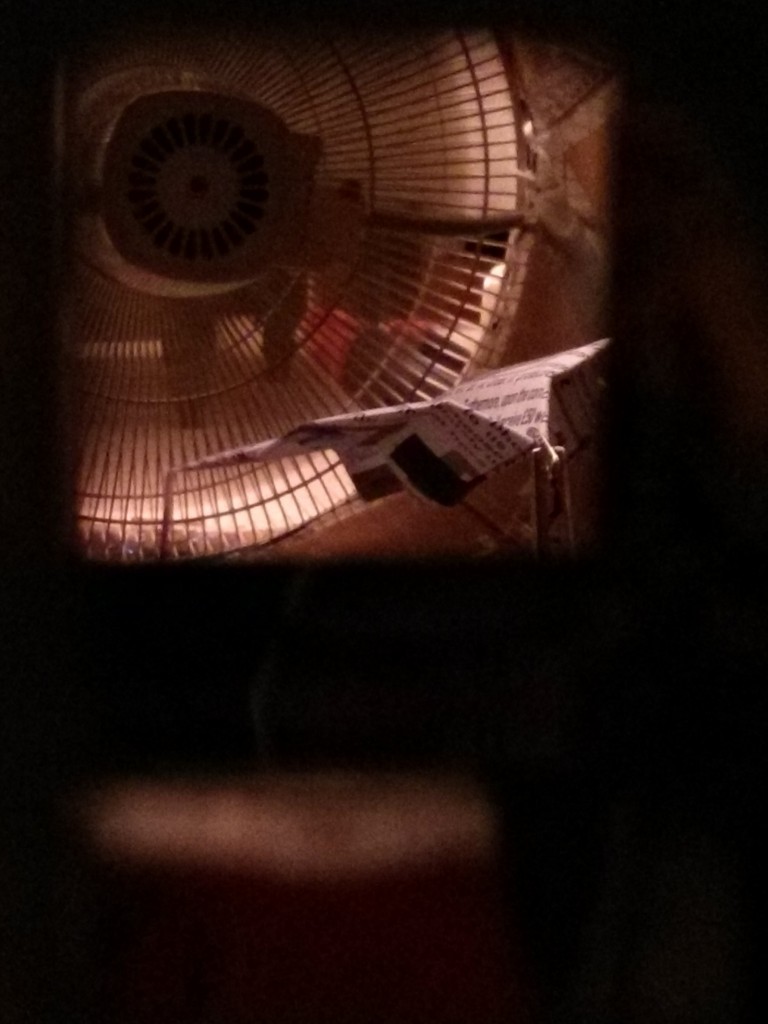
A look inside the wind tunnel after loading a young boy’s paper aeroplane.
Purpose
Why paper aeroplanes? Well, first of all we are both engineers so have been making paper planes for as long as we can remember, but there’s more than that; paper planes are an evocative symbol of frivolity that strikes a chord with many. You take a piece of paper that could oh so easily become the base for recording meeting minutes or some other such boring dreariness, and instead you turn it into something aspirational, something that can defy gravity and achieve flight, not to mention catch the back of an unsuspecting colleague’s head by surprise.
You can wow the masses with the pin straight stable flight you can achieve or with your best triple loop-the-loops. Ok… they might not admit to being impressed but, you know, they’re just jealous of your aerodynamic stationery skills.
3 things above all others make paper planes brilliant:
- They are accessible, paper is cheaply available to any budding aeronauticist of any age.
- They are custom and individual with infinite scope for creativity of design both by folds and by felt-tips.
- The simplest are so easy to make a six year old can do it, thereby starting a life time of creating minor irritation by letter-headed aerial bombardment
Ahem, so back onto the wind tunnel…
If you aren’t familiar with wind tunnels, I suggest a quick wiki on the topic.
Wind tunnels are a useful tool for development of high speed cars and aircraft, but we’re a little short of projects that big; in this case we decided to focus on letting people see the aerodynamics for themselves. Most people without an engineering background have never had an opportunity to see how air flow forms around objects, and given the chance find the results both interesting and often quite pretty. Using the tunnel to explain how paper aeroplanes generate lift gave us purpose, gave the young kids something to do to get involved and hopefully may have got someone a little more interested in aerodynamics or technology. It also allowed us to demo the wind tunnel to show people that they can make a working wind tunnel without much expense or difficulty.
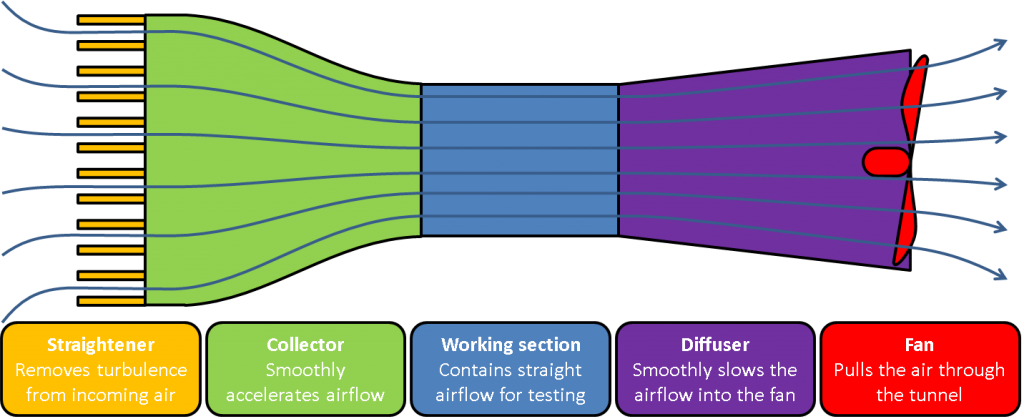
The tunnel we built is called an open loop wind tunnel, meaning it sucks air in from the room one end and blows it out the other end. This is the easiest type to build and has the largest working section for its size. There are 5 key parts to open loop tunels:
With most of our projects we try to make our builds accessible and inexpensive so in this case we have built our wind tunnel mostly from cardboard and scrap:
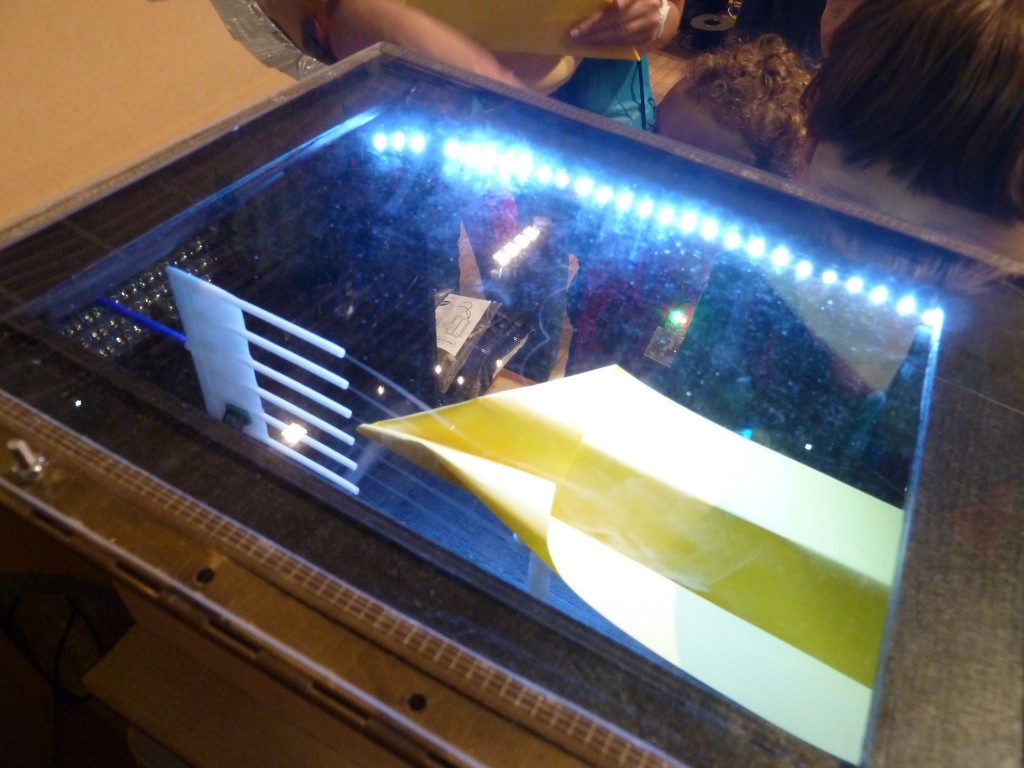
Flow straightener
View of the flow straightener on the near end of the wind tunnel.
This project has seen some keen skip-diving, including the acquisition of our flow straightener. Our first thought was some honeycomb composite core material, but the price turned our stomachs a little. We then looked into the more usual drinking straw approach. While cutting down hundreds of straws to inch long sections and gluing them together works well, I jumped at the opportunity to avoid the hassle when I saw a skip full of office lighting diffuser grids of the appropriate dimensions. Taping three grids together in series seems to work well for straightening the air entering the tunnel.
Collector
The ducting on the right between the straightener and the working section is the collector
In an initial build we guessed a suitable shape for the collector, thinking we would remake it. In further research I found a NASA wind tunnel design aimed for schools to build that was almost identical, so we decided to leave it as it was.
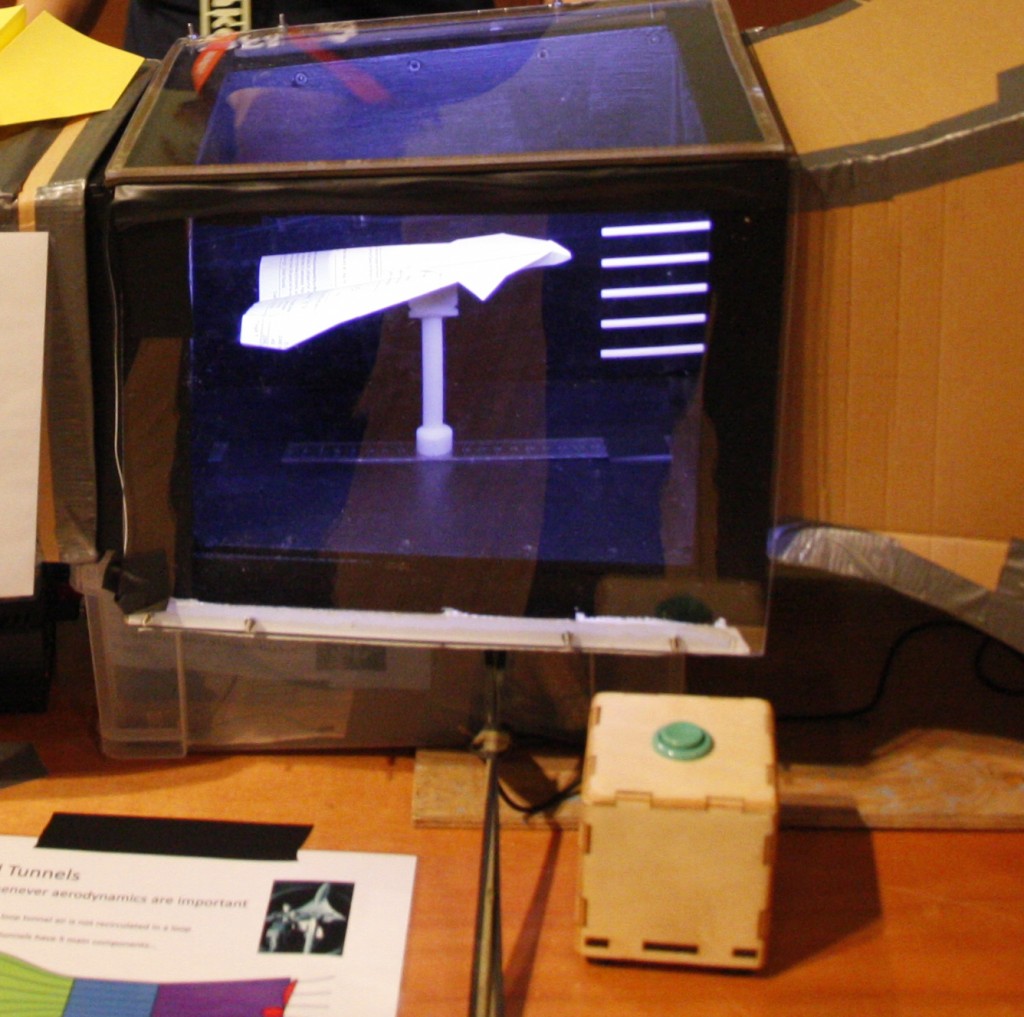
Working section
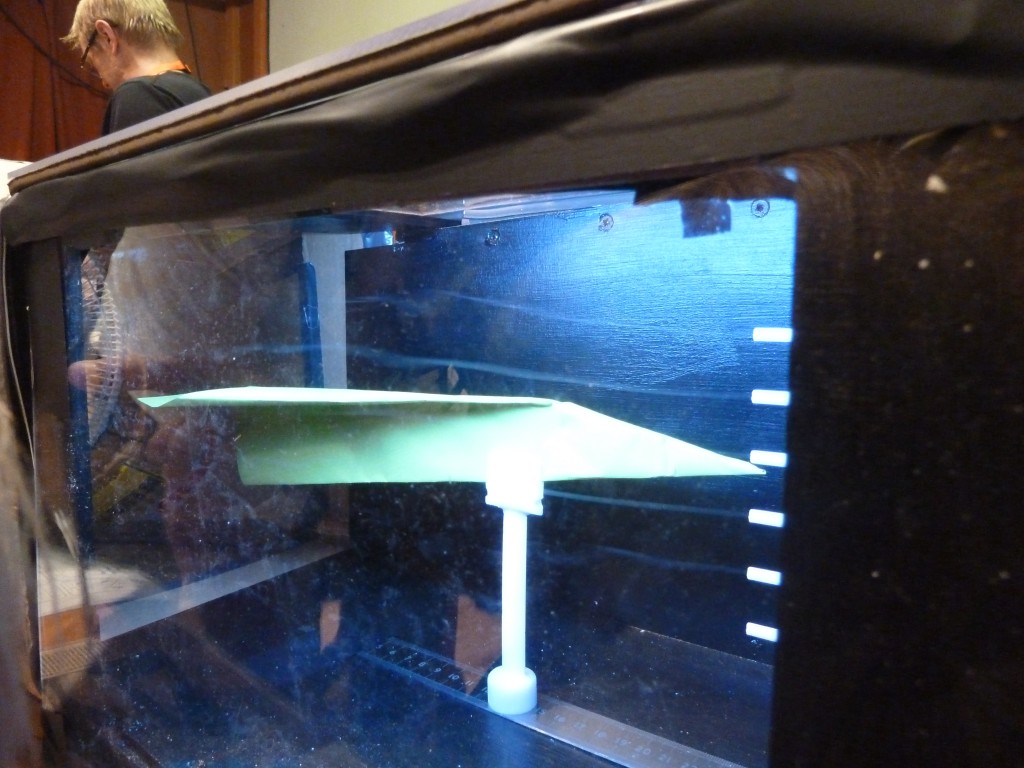
The working section is where testing can be performed as the airflow is smooth and straight
Our working section is the only part not built from scrap. The body of this section was laser cut from plywood, and the screens were cut from new acrylic for clear viewing. The clips used to mount the paper plane were 3D printed on an PP3DP Up! 2. The base of the clip has a neodymium magnet push fit inside for easy swapping of planes. The clip magnets were stuck onto a steel rule taped to the bottom of the working section allowing easy positioning.
3D printed streamlined smoke distribution nozzle
To visualise flow within the working section we used smoke trails introduced by another 3D printed part, an aerodynamically streamlined splitter nozzle. The smoke itself is actually a non-toxic vapour generated by heating a water/glycerine/propylene glycol mix. To do this safely we used a ‘Zero Blaster’ toy smoke ring gun with 3D printed adapters (you may have guessed I recently got access to a new Up! 3D printer at work), with a small fan to blow the smoke out of the chamber through a straw. LED strip lighting illuminated the smoke trails, although while the smoke was visible at low speeds it was very faint as the fan speed increased.
Diffuser
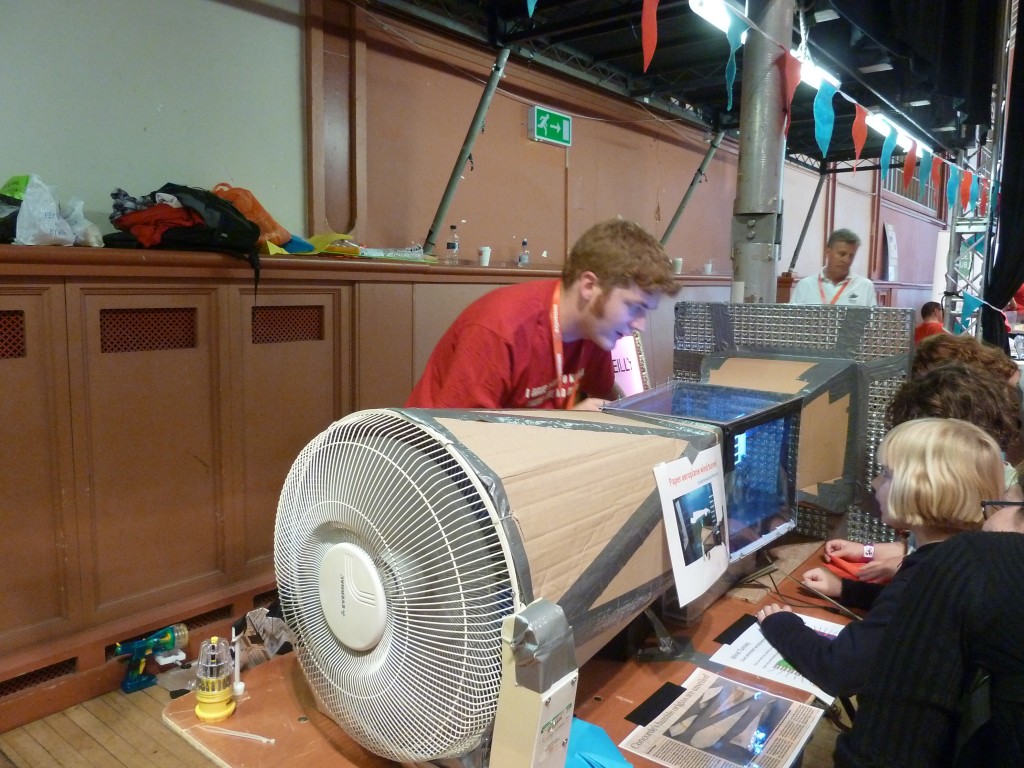
The ducting between the working section and the fan is the diffuser. The design is based on one by NASA. Yes NASA baby!
Our original build saw an ugly square to hexagon to circle diffuser, but on discovering the NASA plans linked above we remade it to a design that was similar albeit of cardboard and gaffa tape construction.
Fan
We used a pedestal fan rescued from a skip for our tunnel
When we started out we were worried that a standard pedestal fan wouldn’t have the beans to create the required airflow, but a quick pre-build build showed that my living room fan could easily kite my favourite paper plane design – the most stable design I know – on a short tether from a crocodile clip. Call me psychic, but I soon sensed that filling our living room with a very untidy cardboard wind tunnel taped to our only fan the very day the UK plunged into a 35°C heatwave was not the romantic gesture my relationship needed. The obvious solution was skip diving (of course). Mark and I liberated a pedestal fan with a broken pedestal from a nearby skip and the tunnel relocated to my garage. Problem solved.
Green button

Girl presses the button to activate the wind tunnel
Possibly the most unexpectedly popular feature of the wind tunnel was the big green button we used to activate the fan. Many kids seemed to have an unstoppable urge to press the button without even knowing what it did. It was pressed… a lot…

Laser cut plywood ready to assemble
It was a green arcade button that Mark wired to a timed relay and put in a really nice laser cut plywood box.
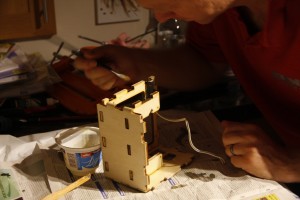
Mark gluing the box together
The result? See for yourselves…
Green button!
Next steps
It seems like a good idea to try to improve the smoke a little.
Aside from that, adding a way to measure lift/drag ratio might be a nice way to add a competitive edge to the plane testing (for the older participants to enjoy;)
Perhaps a linkage covering an arc with a pointer, or a couple of microbalances, but that is for later…
Fly little plane, fly!
Good work chaps! Love the blue LEDs.
Really enjoyed reading the article. Great work.
Pingback: Perfecting Paper Planes Peering Past Perspex Portals | Sverige Energy