This project is a fun one but the write up will be brief because there are few photos – it was designed and built in a day… a testament to how 3D printing accelerates the design process!

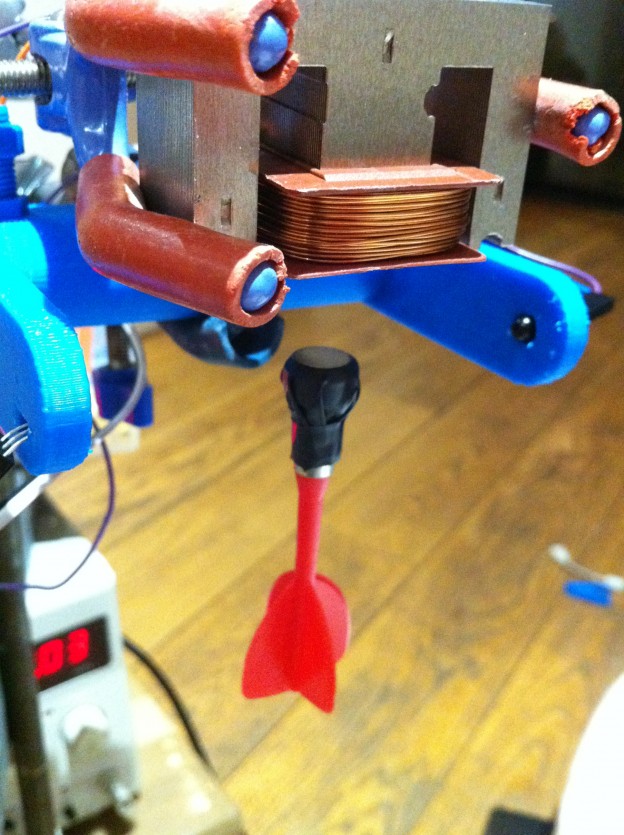
Close up on floating dart
Our theme for Brighton Maker Faire was levitation. One of the ways of achieving levitation is using an electromagnet controlled at high speed to stabilise the naturally highly unstable attraction of a magnet. Attractive DC maglev.
All that is needed is:
- an electromagnet (in this case part of a transformer from an old wall wart)
- A magnetic object to attract (in this case a magnetic dart)
- A means of sensing the position of the object (we used an IR light gate)
- A controller to vary the electromagnet accordingly (arduino+motor shield)
Several similar projects can be found online using a hall effect sensor for sensing position, but when I heard that someone had attempted it using a light gate I loved the simplicity of it so had to have a go. The light gate is simply and IR LED like you would find in any old TV remote and IR photodiode receiving the light and giving an analogue signal to the arduino. As the dart moves up it casts a shadow through the light gate telling the arduino to drop the magnet current.
We 3D printed the lightgate to hold the LED and photodiode accurately relative to the magnet, essential for successful control.
The hardest part is tuning the controller to stabilise it. The arduino is quick enough, but there is no time for writing to serial or anything, the control loop needs to run really quickly. finding the unstable equilibrium point isn’t too hard, then there is the game of introducing damping… My controller was PD, a proportional component to centre the edge of the dart half way up the LED and a derivative term to try to stop it moving. The gain has to be high enough to act before the dart falls out of the 5mm led width, but low enough to avoid overcompensating and picking up noise. We found a 15:1 ratio of derivative to proportional worked best.

Floating at Brighton Maker Faire 2014
The last part was to make the stand. You might have noticed the Lab clamp in the first picture… this was replaced with custom 3D printed supports, attached to a scrap metal lever which happened to be threaded for its handle, allowing it to screw securely into a hole in the side of an empty UP filament reel that our 3D print plastic comes on to make a simple base for the stand.
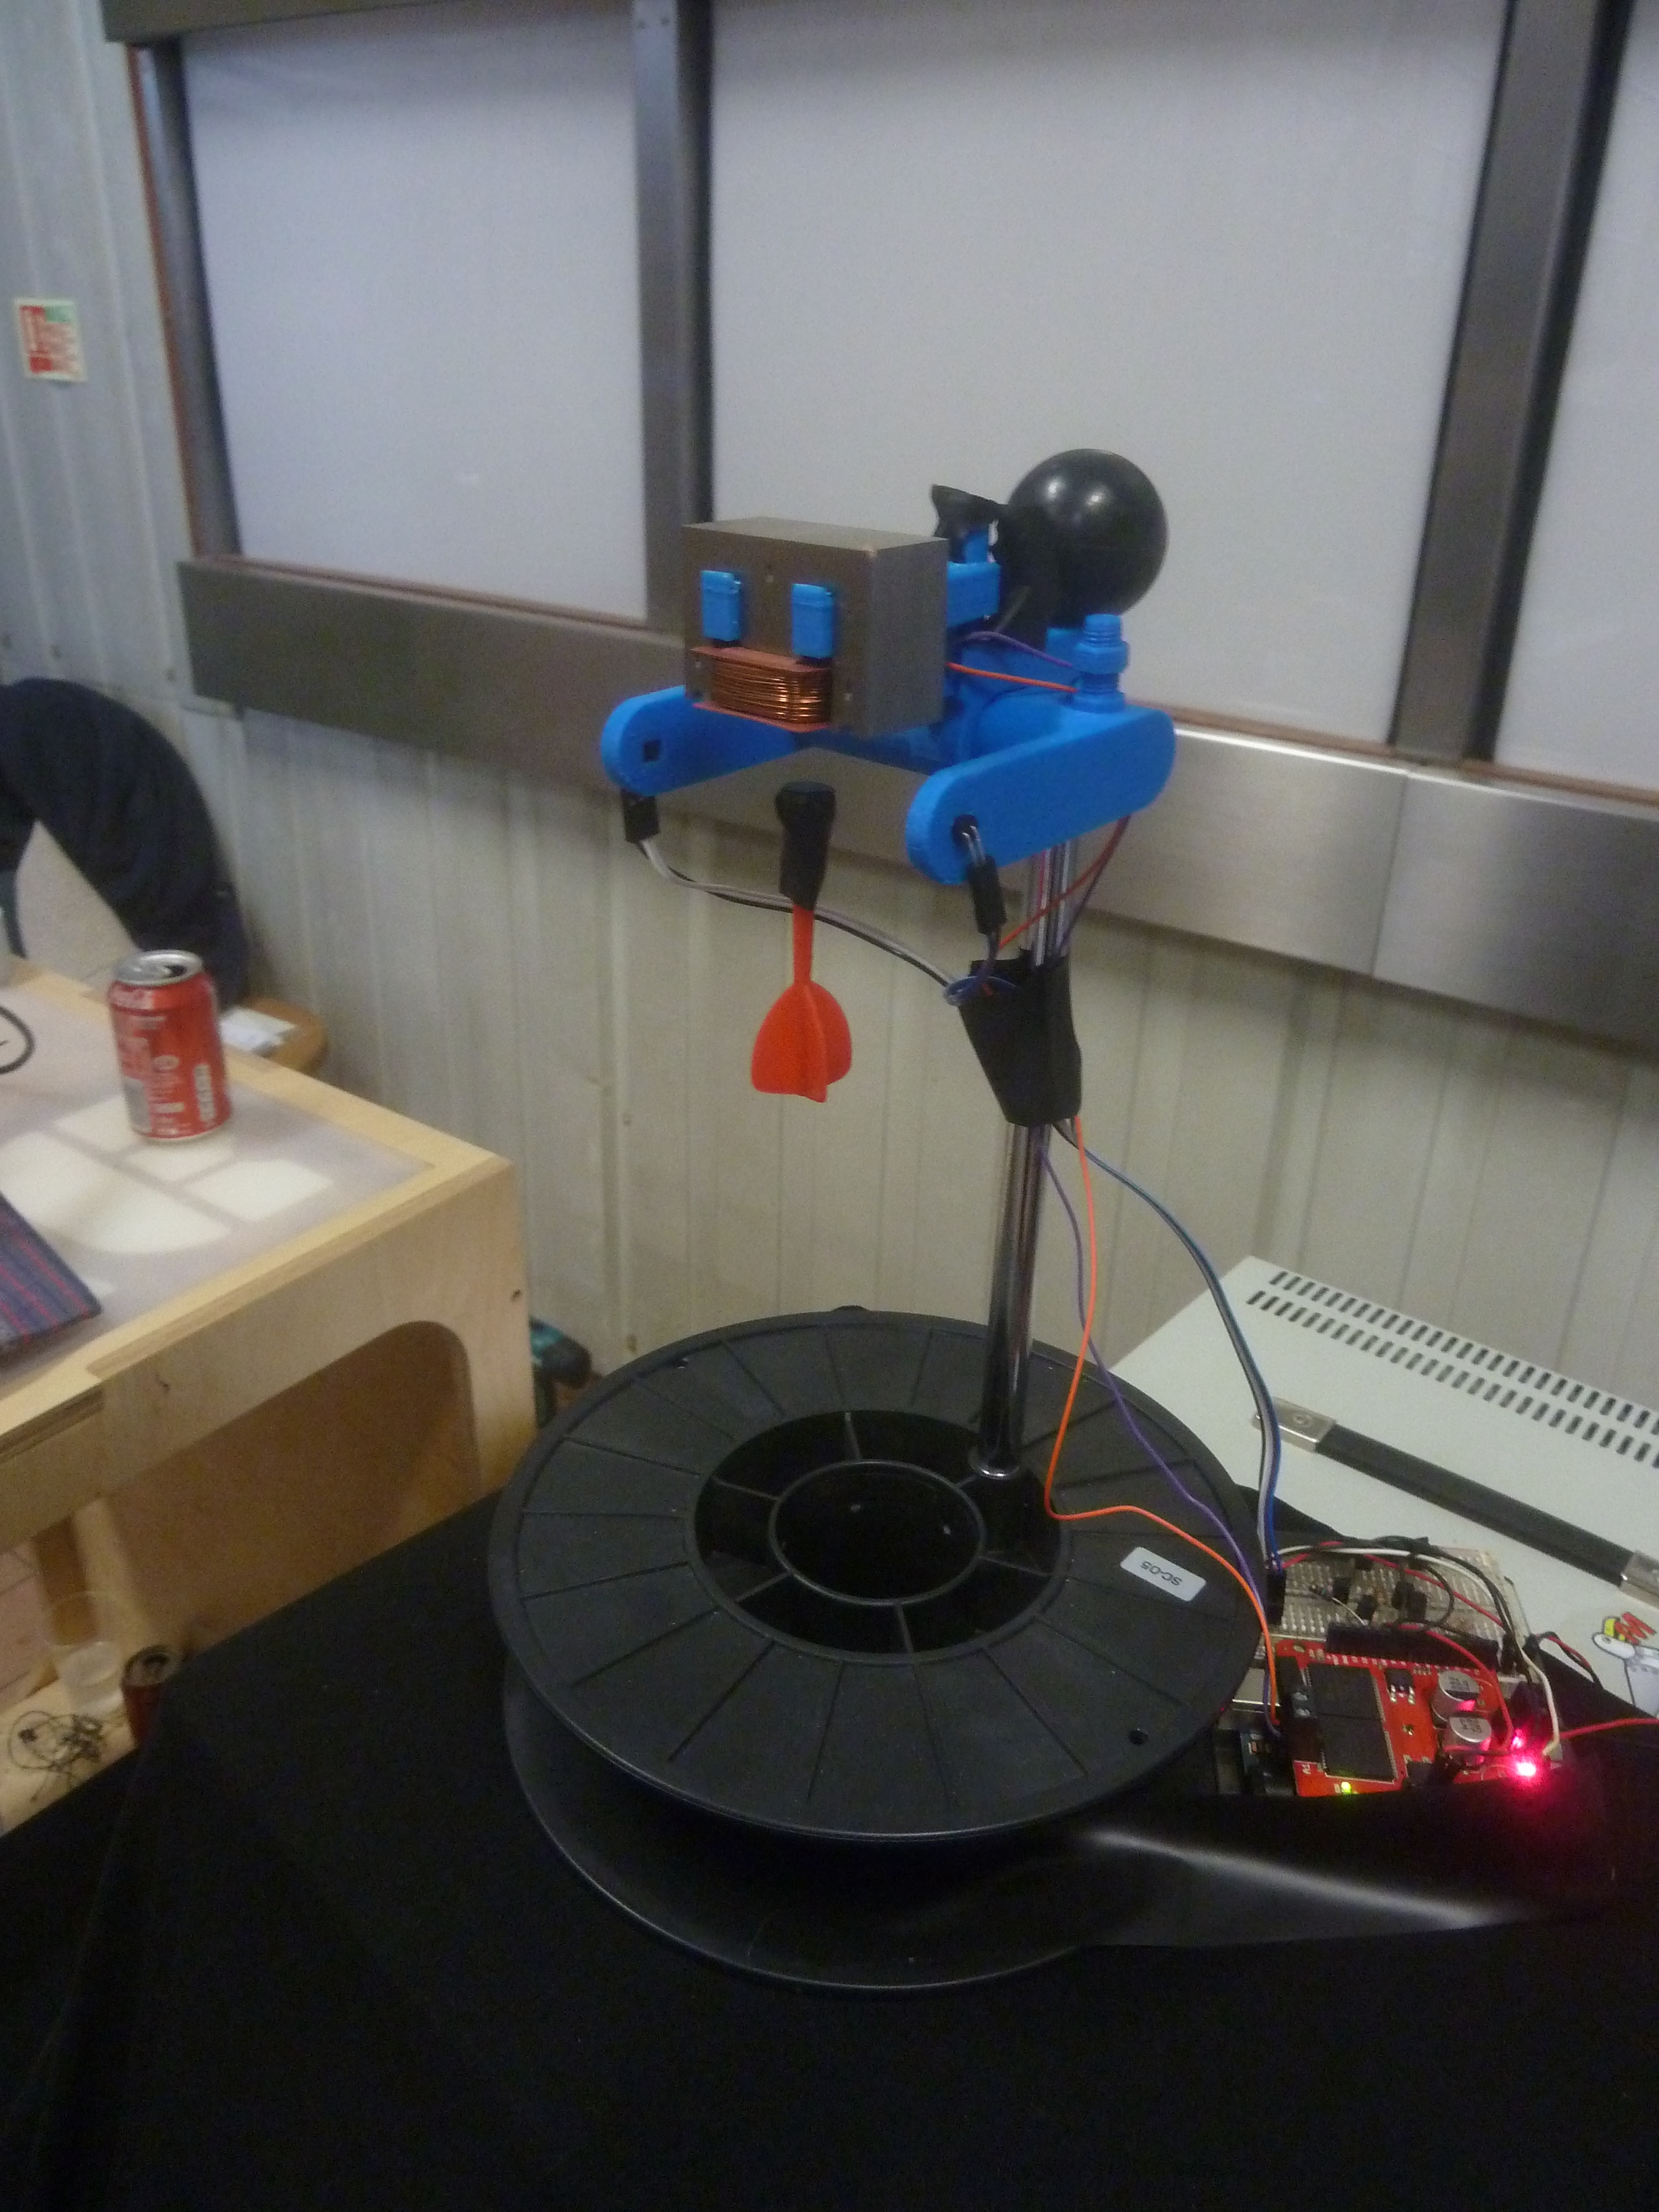
The whole rig at Derby Mini Maker Faire 2014
You may notice the printed M8 screw threads on the light gate holder… this was originally intended to allow adjustment in height from the electromagnet. Given the short timings and that it worked without we never implemented this, but the screw threads worked really well as printed, without any need for tap or die on either thread or nut. We ended up printing nuts and bolts to demo the UP 3D printer at Brighton too!