
A lamp with racing pedigree
This is the F1 themed lamp I made. I posted the detail on instructables here so this will just be a quick summary.

Awesome twisting tubes tumbling out of the engine on this classic Lotus F1 car taken at Goodwood 2013
I have always loved the way the exhaust manifold tubes from multicylinder race engines tumble around each other as they try to escape towards the tail pipe.

Awesome tubiness of the Williams V10 F1 exhaust
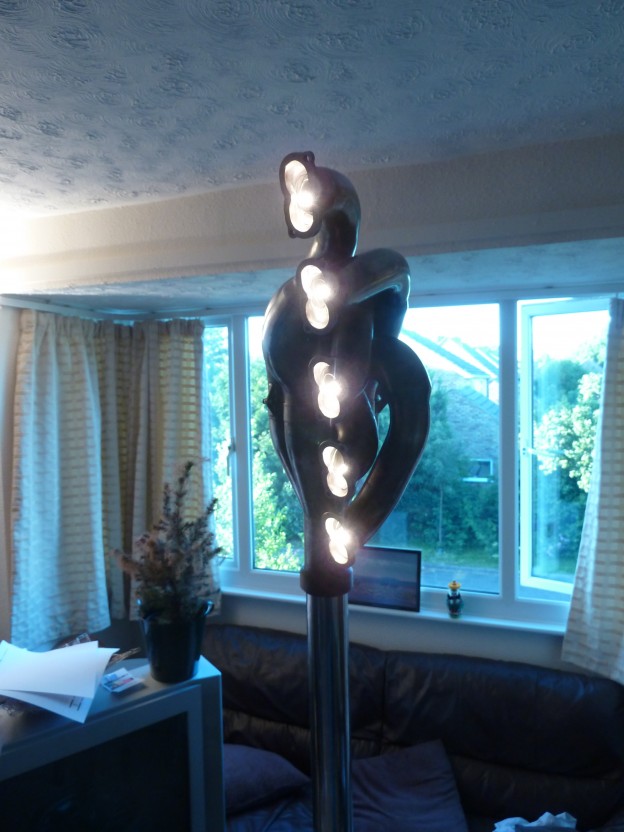
So when I found a Williams V10 exhaust manifold on eBay I had to get it and turn it into something… I soon decided I wanted to put a lamp in each pipe to make a floor standing feature lamp.

Bar stool
I started by identifying the base for the lamp. I chose a bar stool for its chrome design, as well as appropriate size, strength and stability. The gas strut for the variable height attached to the base with just one circlip making dismantling easy.

Bits for the base including the Red Bull RB6 wheel from Webber’s 2010 car
I also decided to use a tube of polished stainless exhaust pipe to support the exhaust and found that 2.5″ tube almost perfectly matches the 66mm diameter at the end of the exhaust.
Just before ordering this tube I decided to spice up the design of the base by adding more F1 goodness. I managed to get a wheel from Mr Webber’s 2010 Red Bull that fits perfectly over the stem of the bar stool base.
I 3D printed two spacers that centralise the wheel on the stem and the tube onto the stem and wheel. Both were designed as push fits to make it all hold together. The result is a really well supported shaft to attach the exhaust to.

Base with spacers fitted

- Shaft fitted

I then 3D printed a butt-joint connector to press fit into the tube and exhaust pipe to attach the exhaust manifold rigidly to the stand.

Butt-joint connector

- Butt-joint connector fitted

Having checked the fit I then took it all to pieces again to wire up the lighting. I fitted G4 bulb holders, fed the wires through, crimped the connections and hooked it up to a 12V power supply.
The result was pretty awesome:


